Clever Cloud API Overview
The Clever Cloud Console and Clever Tools allow you to manage your account and products with the same public API you can use for your own services and integrations. This article will explain how to connect to this API and use it.
Request the API
Clever Cloud’s REST API offers two authentication mechanisms to meet different integration needs:
API tokens provide a straightforward way to authenticate requests on behalf of a specific user. These tokens operate similarly to passwords and should be handled with appropriate security measures. API tokens are ideal for personal scripts, CLI tools, and scenarios where you’re accessing your own resources. Use them to request the API Bridge: https://api-bridge.clever-cloud.com
OAuth 1 is designed for third-party applications that need to access Clever Cloud resources on behalf of their users. This authentication flow allows applications to request permissions from users without requiring direct access to their credentials. OAuth 1 is recommended for public applications, services that integrate with multiple user accounts, or any scenario where user delegation is required.
Choose the authentication method that best aligns with your specific integration requirements and security considerations.
API tokens
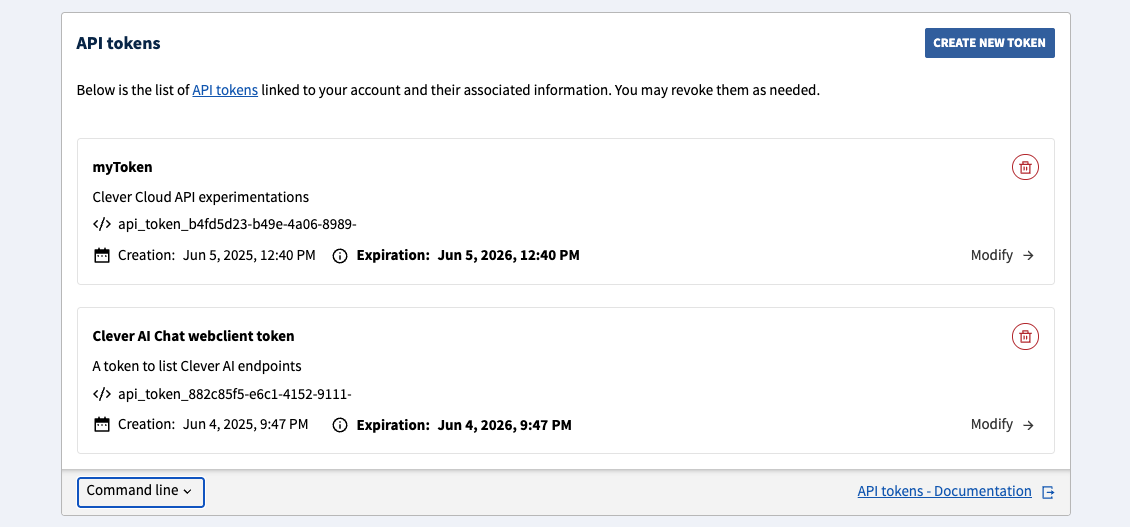
Clever Cloud Console allows you to easily create and manage API tokens.
Clever Tools provides a clever tokens set of commands. This feature needs to be enabled:
clever features enable tokens
clever tokens create "CI job Foobar"
clever tokens create "Quick local test" --expiration 1h
You can also list or revoke tokens:
clever tokens -F json
clever tokens revoke api_tokens_xxx
Once created, API tokens must be used through the bridge URL:
curl https://api-bridge.clever-cloud.com/v2/self -H "Authorization: Bearer [API_TOKEN]"clever curl
clever curl is a wrapper around curl, it supports the same arguments and handles the authentication automatically for you using the CLI account you’re currently logged in with. It’s a simple way to make requests to the Clever Cloud API if Clever Tools are installed on your system.
clever curl https://api.clever-cloud.com/v2/self
clever curl https://api.clever-cloud.com/v2/summary
clever curl https://api.clever-cloud.com/v4/products/zones
clever curl https://api.clever-cloud.com/v2/organisations/<ORGANISATION_ID>/applications | jq '.[].id'
clever curl https://api.clever-cloud.com/v4/billing/organisations/<ORGANISATION_ID>/<INVOICE_NUMBER>.pdf > invoice.pdf
Official clients/SDKs
You can request the Clever Cloud API from multiple languages through our official clients/SDKs:
OAuth1
If you have an application that needs to access Clever Cloud resources on behalf of your users, you can use OAuth1. This is the recommended way to authenticate third-party applications.
- To manage OAuth tokens linked to your account, use the Clever Cloud Console
- A complete working example (Node.js) is available at github.com/CleverCloud/oauth1-example
Create an OAuth consumer
First, you’ll need to create an OAuth consumer for your application. This can be done in the Clever Cloud Console. Go to your organisation, click on Create…, then on an OAuth consumer and fill the form. You will get:
- A consumer key (public identifier for your application)
- A consumer secret (private key, never expose it client-side)
Note
The base URL you set when creating the consumer is important: the callback URL you use during the OAuth flow must match this base URL’s domain. For local development, register a separate consumer with http://localhost:<port> as the base URL.
The OAuth1 flow
Your application must implement the OAuth 1.0a flow (also known as the “OAuth dance”). It consists of three steps: obtaining a request token, redirecting the user for authorization, and exchanging for an access token.
Get a request token
Request a temporary token from the API. OAuth parameters can be sent as query string parameters or as a form-encoded body:
POST https://api.clever-cloud.com/v2/oauth/request_token_query— parameters as query stringPOST https://api.clever-cloud.com/v2/oauth/request_token— parameters asapplication/x-www-form-urlencodedbody
Required parameters:
| Parameter | Description |
|---|---|
oauth_consumer_key | Your consumer key |
oauth_signature_method | HMAC-SHA512, HMAC-SHA1, or PLAINTEXT |
oauth_signature | Request signature (see Signing requests) |
oauth_timestamp | Current Unix timestamp (seconds) |
oauth_nonce | Unique random string for this request |
oauth_version | Must be 1.0 |
oauth_callback | URL to redirect the user to after authorization |
Example request (see Signing requests for how to compute the signature):
const url = "https://api.clever-cloud.com/v2/oauth/request_token_query";

const params = {
  oauth_consumer_key: CONSUMER_KEY,
  oauth_signature_method: "HMAC-SHA512",
  oauth_timestamp: Math.floor(Date.now() / 1000).toString(),
  oauth_nonce: crypto.randomUUID().replace(/-/g, ""),
  oauth_version: "1.0",
  oauth_callback: "http://localhost:8080/auth/callback",
};

// buildBaseString and sign are defined in the "Signing requests" section
const baseString = buildBaseString("POST", url, params);
params.oauth_signature = sign(baseString);

const qs = new URLSearchParams(params).toString();
const res = await fetch(`${url}?${qs}`, { method: "POST" });
Tip
For quick testing, you can use PLAINTEXT with curl (percent-encode your consumer secret if it contains non-alphanumeric characters):
curl -X POST "https://api.clever-cloud.com/v2/oauth/request_token_query?\
oauth_consumer_key=<CONSUMER_KEY>&oauth_signature_method=PLAINTEXT&\
oauth_signature=<CONSUMER_SECRET>%26&oauth_timestamp=$(date +%s)&\
oauth_nonce=$(uuidgen)&oauth_version=1.0&\
oauth_callback=http%3A%2F%2Flocalhost%3A8080%2Fauth%2Fcallback"
Response (application/x-www-form-urlencoded)
oauth_token=<REQUEST_TOKEN>&oauth_token_secret=<REQUEST_TOKEN_SECRET>&oauth_callback_confirmed=trueStore the oauth_token_secret securely server-side — you will need it in step 3.
Redirect the user to authorize
Redirect the user’s browser to the authorization page with the request token:
https://api.clever-cloud.com/v2/oauth/authorize?oauth_token=<REQUEST_TOKEN>The user logs into Clever Cloud (if not already) and is presented with a permissions form. Available permissions are:
| Permission | Description |
|---|---|
access_organisations | Access organisations |
access_organisations_bills | Access organisations’ bills |
access_organisations_consumption_statistics | Access organisations’ consumption statistics |
access_organisations_credit_count | Access organisations’ credit count |
access_personal_information | Access personal information |
manage_organisations | Manage organisations |
manage_organisations_applications | Manage organisations’ applications |
manage_organisations_members | Manage organisations’ members |
manage_organisations_services | Manage organisations’ add-ons |
manage_personal_information | Manage personal information |
manage_ssh_keys | Manage SSH keys |
You can retrieve this list programmatically with GET https://api.clever-cloud.com/v2/oauth/rights.
Once the user approves, the browser is redirected to your oauth_callback URL with the following query string parameters:
| Parameter | Description |
|---|---|
oauth_token | The request token (must match the one from step 1) |
oauth_verifier | Verification code to exchange for an access token |
Exchange for an access token
Exchange the request token and verifier for an access token. As with step 1, parameters can be sent as query string or form body:
POST https://api.clever-cloud.com/v2/oauth/access_token_query— parameters as query stringPOST https://api.clever-cloud.com/v2/oauth/access_token— parameters asapplication/x-www-form-urlencodedbody
Required parameters:
| Parameter | Description |
|---|---|
oauth_consumer_key | Your consumer key |
oauth_signature_method | Same method as step 1 |
oauth_signature | Request signature (signed with the request token secret from step 1) |
oauth_timestamp | Current Unix timestamp (seconds) |
oauth_nonce | Unique random string |
oauth_version | 1.0 |
oauth_token | The request token from step 1 |
oauth_verifier | The verifier from the callback redirect |
Response (application/x-www-form-urlencoded)
oauth_token=<ACCESS_TOKEN>&oauth_token_secret=<ACCESS_TOKEN_SECRET>&expiration_date=<ISO_8601_DATE>Store both oauth_token and oauth_token_secret securely — you will need them to sign every subsequent API request.
Note
Access tokens expire after 3 months by default. The response includes an expiration_date field (ISO 8601 format).
Making authenticated API requests
Once you have the four credentials (consumer key, consumer secret, user token, user token secret), sign every API request using the Authorization header:
Authorization: OAuth oauth_consumer_key="<CONSUMER_KEY>", oauth_token="<ACCESS_TOKEN>", oauth_signature_method="HMAC-SHA512", oauth_signature="<SIGNATURE>", oauth_timestamp="<TIMESTAMP>", oauth_nonce="<NONCE>", oauth_version="1.0"Example — Fetching the authenticated user’s profile:
// buildBaseString, sign and authorizationHeader are defined in the "Signing requests" section
const params = {
  oauth_consumer_key: CONSUMER_KEY,
  oauth_signature_method: "HMAC-SHA512",
  oauth_timestamp: Math.floor(Date.now() / 1000).toString(),
  oauth_nonce: crypto.randomUUID().replace(/-/g, ""),
  oauth_version: "1.0",
  oauth_token: ACCESS_TOKEN,
};

const baseString = buildBaseString("GET", "https://api.clever-cloud.com/v2/self", params);
params.oauth_signature = sign(baseString, ACCESS_TOKEN_SECRET);

const res = await fetch("https://api.clever-cloud.com/v2/self", {
  headers: { Authorization: authorizationHeader(params) },
});
const user = await res.json();
Signing requests
Three signature methods are supported. HMAC-SHA512 is recommended for production use.
PLAINTEXT
The simplest method. The signature is the consumer secret and token secret, percent-encoded per RFC 3986 and joined with &:
const signature = percentEncode(consumerSecret) + "&" + percentEncode(tokenSecret);For the request token step (where no token secret exists yet), leave the second part empty:
const signature = percentEncode(consumerSecret) + "&";Note
The percentEncode function is defined in the HMAC section below. For secrets containing only alphanumeric characters, encodeURIComponent produces the same result.
HMAC-SHA1/SHA512
These methods sign a base string to ensure the request has not been tampered with. The code snippets below are a JavaScript/Node.js implementation example.
1. Define a percentEncode helper per RFC 3986:
// Like encodeURIComponent, but also encodes !'()*
function percentEncode(str) {
  return encodeURIComponent(str)
    .replace(/[!'()*]/g, c => "%" + c.charCodeAt(0).toString(16).toUpperCase());
}
2. Define buildBaseString — it concatenates the HTTP method, URL, and sorted parameters, all percent-encoded and joined with &:
function buildBaseString(method, url, params) {
  const sorted = Object.keys(params)
    .filter(k => k !== "oauth_signature")
    .sort()
    .map(k => percentEncode(k) + "=" + percentEncode(params[k]))
    .join("&");
  return method.toUpperCase() + "&" + percentEncode(url) + "&" + percentEncode(sorted);
}
The three components are:
- The HTTP method in uppercase (
GET,POST, etc.) - The base URL (without query string), percent-encoded
- All request parameters (OAuth parameters excluding
oauth_signature, plus any query string or form body parameters), sorted alphabetically by key — then by value in case of duplicates — formatted askey=valuepairs joined by&, then percent-encoded as a single string
3. Define sign — it computes an HMAC with the chosen algorithm and returns the base64-encoded result:
const { createHmac } = await import("node:crypto");

function sign(baseString, tokenSecret = "") {
  const signingKey = percentEncode(consumerSecret) + "&" + percentEncode(tokenSecret);
  return createHmac("sha512", signingKey).update(baseString).digest("base64");
}
4. Build the Authorization header with all OAuth parameters (including the signature):
function authorizationHeader(params) {
  const pairs = Object.entries(params)
    .map(([k, v]) => percentEncode(k) + '="' + percentEncode(v) + '"')
    .join(", ");
  return "OAuth " + pairs;
}Did this documentation help you ?